


Create and populate a remote catalog
- learn the ways to share a solution
- create your own catalog on GitLab or GitHub
- deploy a solution to the catalog
- update the catalog in your collection
There are three ways to share a solution. For quick feedback, send the solution file or folder to a collaborator: they
run it with album install and album run on its path. To make it available to a group or a community, deploy it to a
catalog. For a citable release, use a catalog that publishes each solution version on Zenodo with a DOI.
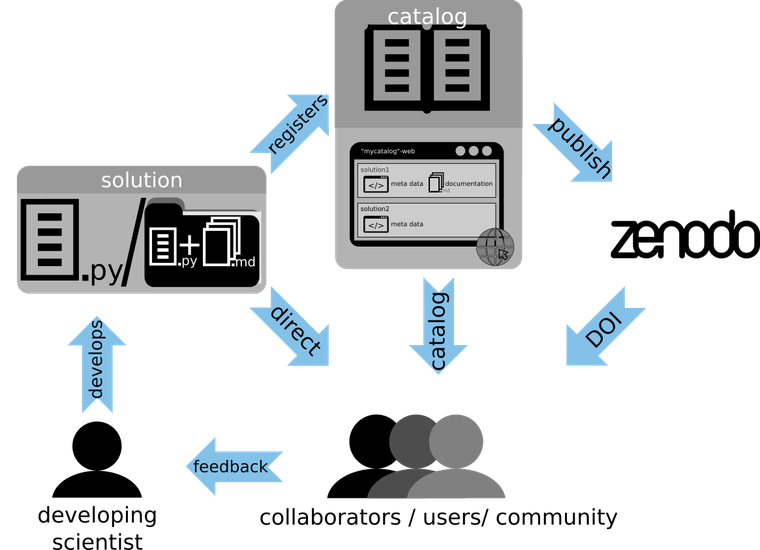
A catalog is a git repository. There are two kinds:
- direct catalogs: a deployed solution is available right away - good for your own work and fast iterations
- request catalogs: deploying creates a merge request that the maintainers review - good for shared catalogs and releases with DOIs (Zenodo setup)
Create an empty repository, copy its SSH URL (git@...git) and make sure you can push to it. Then turn it into a
catalog:
album clone template:catalog <repo-url> my-catalog
template:catalog creates a direct catalog, template:catalog-request a request catalog. The variants
template:catalog-gatsby and template:catalog-request-gatsby add a catalog website.
album add-catalog <repo-url>
album deploy my-solution my-catalog
album deploy commits to the git repository of the catalog, so git needs your name and email: set them once with
git config --global user.name and user.email, or pass --git-name and --git-email to album deploy.
Your solution is now in the catalog repository. Get the new state of the catalog into your collection:
album update my-catalog
album upgrade my-catalog
That's it - everyone who adds your catalog can now install and run your solution. More in the catalog guide.
Just leave a comment in the box below after signing in with GitHub. Any feedback is highly appreciated.